How to Set Up Single Sign-On (SSO)?
Puru Choudhary
July 22, 2025
Unlock Effortless Team Access: How to Set Up Single Sign-On (SSO) with Terminus
Let’s talk about logging in. Not exactly the exciting topic, right? But what if I told you that how your team logs into your Terminus account could dramatically improve security, streamline onboarding, and reduce password-related headaches all with a few simple steps?
If you’re managing a growing team or dealing with multiple users across departments, keeping login access secure and user-friendly is no small feat. That’s where Single Sign-On (SSO) becomes your new best friend. Not only does it let your team sign in using your company’s existing identity system, but it also helps you keep everything centralized and compliant without the chaos.
So, buckle in! Whether you’re an IT admin, a marketing ops lead, or just someone who’s tired of juggling passwords, this blog is your guide to everything you need to know about setting up SSO in Terminus. And don’t worry, we’re keeping things casual, clear, and maybe even a little fun.
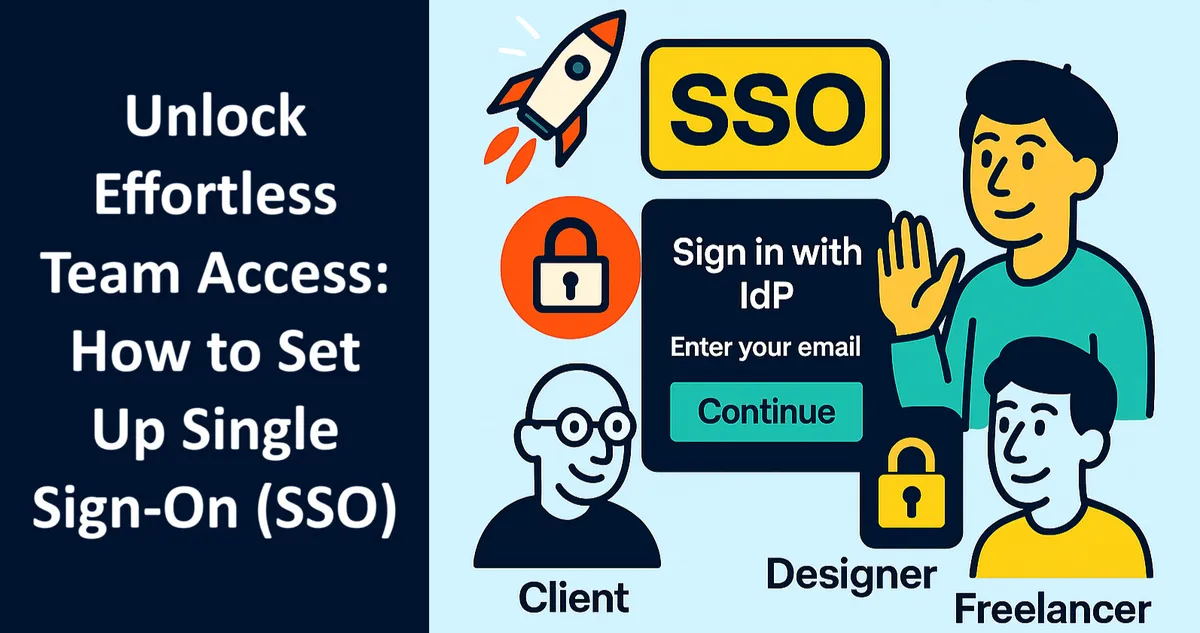
What Is SSO and Why Should You Care?
Imagine this: your team starts their day, logs into their company dashboard, and bam, they’re automatically signed into Terminus without entering another password. No password reset emails, no extra logins, no friction.
That’s the magic of Single Sign-On (SSO). It lets your team access multiple applications using just one login, typically managed by your company’s Identity Provider (IdP). Think of the IdP as the gatekeeper that verifies who your users are.
So why does this matter?
- Security: Fewer passwords mean fewer opportunities for cyber mishaps. SSO ensures everyone signs in through your centralized identity system.
- Simplicity: Users get quick access without remembering (or misplacing) yet another password.
- Control: You decide who gets access and when. Adding or removing users happens in one place.
The SSO Process at a Glance:
- User Logs In
- Company IdP Verifies
- Terminus Access Granted
Is SSO for You?
Before we dive into the how-to, let’s answer the obvious: Is this something your team can use?
If your plan supports SSO and you’re using a popular Identity Provider like Okta, Microsoft Azure AD, OneLogin, or similar, you’re good to go. Terminus supports the widely-used SAML 2.0 protocol, which means it plays nicely with nearly every enterprise IdP out there.
SSO isn’t just for huge enterprises anymore. Even mid-sized teams benefit from centralized access and streamlined user management. If you’re serious about scalability and security, SSO is a must.
Step-by-Step: Setting Up SSO in Terminus
Now that we’ve covered the “why,” let’s dig into the “how.” Don’t worry, this isn’t as technical or intimidating as it might sound. If you’ve ever configured settings in your IdP before, you’ll feel right at home.
Let’s break it down.
1. Start in Terminus
First, you’ll want to head over to your Terminus account settings. From the top nav, jump into the Account Settings area and find the Single Sign-On tab. You’ll see an option to Enable SAML SSO. Go ahead and check that box.
Once enabled, Terminus will generate a few important pieces of information you’ll need in your IdP setup, things like:
Assertion Consumer Service (ACS) URLSP Entity ID
Terminus > Account Settings > Single Sign-On
SAML SSO Configuration:
- Assertion Consumer Service (ACS) URL:
https://app.terminusapp.com/auth/saml/callback?uid={your unique id} - SP Entity ID:
https://app.terminusapp.com/{your unique id}
2. Set Up a New App in Your IdP
Open a new browser tab and head over to your Identity Provider’s admin panel. You’ll be creating a new SAML 2.0 app, this is the bridge between your IdP and Terminus.
If you’re using Okta, Azure AD, OneLogin, or something similar, each has its own user interface, but the concept is the same. However, follow the instructions based on their documentation to create a new SAML 2.0-based SSO application.
- Name your app something easy to remember.
- If available, upload the logo. A branded icon makes it easy for users to spot.
- From here, you’ll be asked to enter some configuration details.
Mapping Terminus Info to Your IdP:
| In Terminus (Copy this…) | In Your IdP (…Paste here) |
|---|---|
| ACS URL | ACS URL / Callback URL |
| SP Entity ID | Entity ID / Audience URI |
The Key Fields to Watch For:
- ACS URL: This is the URL Terminus uses to receive and validate login responses.
- SP Entity ID: This uniquely identifies Terminus within your IdP environment.
- Name ID Format: Set this to use your team members’ email addresses as identifiers.
3. Paste Your IdP Settings Back Into Terminus
Once your app is ready in your IdP, return to Terminus and input the corresponding information:
- Single Sign-On URL (a.k.a. Login URL)
- SSO Identity Provider Certificate: This is your IdP’s security certificate. You’ll copy the full certificate text, including those
BEGIN CERTIFICATEandEND CERTIFICATElines.
Terminus uses these to authenticate incoming requests, ensuring only users from your authorized IdP can log in.
4. Force SSO (Optional, but recommended)
Let’s say you want to make SSO the default login path for your entire team (which, spoiler alert, is a great idea from a security standpoint). This setting requires team members to log in using your Identity Provider (IdP) and disables password-based login for them. This enhances security by ensuring users authenticate through your company’s standard procedures. Members with admin privileges are always exempt and can log in with a password. This ensures you can access your account even if your SSO configuration has errors. You have two flexible ways to control which users are required to use SSO: by their email domain or by their group membership.
a. SSO Domains (The Recommended Route)
You can specify which email domains should be required to log in via SSO. For example:
yourcompany.com
marketing.yourcompany.com
If a user has an email address matching one of these domains, they’ll automatically be directed to use SSO. Others, like agencies or freelancers, can still log in with a password.
b. Group-Based Exceptions
Need even more granular control? Maybe your SEO agency can’t use your IdP. No problem. You can create a user group like “External Partners,” assign users to it, and allow that group to continue using password login.
How Terminus Handles Logins
User attempts to log in…
Is user in SSO domain?
YES
Redirect to SSO login
NO
Allow password login
…or is user in an exception group?
Bonus: Admins always retain password access, so if anything goes wrong with your SSO configuration, you’re never locked out.
5. Enable Auto-Provisioning (Optional, But Awesome)
Here’s a neat feature: Terminus supports just-in-time user creation via SSO. That means when a new user logs in for the first time via your IdP, their account in Terminus is automatically created on the fly.
No need to manually invite people or assign roles. Just make sure they exist in your IdP, and you’re good to go.
6. Add or Remove Users With Confidence
Once SSO is in place, you’ll manage most user access through your Identity Provider. Adding someone to Terminus? Grant them access to your IdP. Removing someone? Do the same there and follow up in Terminus if needed.
That’s it. Clean, centralized control that fits seamlessly into your IT workflow.
Why Do Teams Love SSO?
By this point, you might be wondering how all this impacts your day-to-day life:
- ✓ Faster onboarding: New hires hit the ground running. No more juggling invites or waiting on manual account creation.
- ✓ Improved security: One login to rule them all means fewer credentials to manage and fewer ways to get hacked.
- ✓ Better compliance: When user access is governed centrally, audits become easier and cleaner.
- ✓ Happy admins: Less password reset drama. Less overhead. More time for strategic work.
It’s not just a feature, it’s a smarter, safer way to work.
Final Thoughts: SSO Isn’t Just IT’s Problem Anymore
Gone are the days when only IT folks cared about login protocols. Today, SSO is a foundational piece of your marketing ops stack. It keeps your team moving quickly, keeps your data safe, and helps everyone focus on what really matters, getting the job done.
So if you’re ready to bring the power of Single Sign-On to your Terminus workspace, now’s the time to dive in.
Need help setting it up?
Our team is always here to guide you. But honestly, once you start, you’ll see how straightforward it really is. It’s one of those upgrades that makes you wonder how you ever lived without it.
Your SSO Setup Is Complete When…
- You’ve enabled SAML SSO in Terminus settings.
- A new “Terminus” SAML 2.0 app is configured in your IdP.
- Your IdP’s SSO URL & Certificate are saved in Terminus.
- You’ve defined which domains or groups must use SSO.
- A team member successfully logs in without a password!
Ready to Try It?
If you’re a Terminus customer on a plan that includes SSO, head to your account settings and get started. Not sure if your plan includes it? Contact our support team or reach out to your CSM.
Security, simplicity, and scalability, all with a single login.
That’s what we call smart access.
- 3 Users
- 5 Projects
- 2 Custom Domains
- Simple Taxonomy
- UTM Rules
- Presets
- Labels
- Notes
- Custom Parameters
- Multi-tag UTM Builder
- Auto-shortening
- Click Reports
- Fine-grained User Permissions
- Auditing Tools
- Chrome Extension
- Custom Domain SSL
- URL Monitoring
- Redirect Codes / Link Retargeting
- Bulk Operations
- 5 Users
- 10 Projects
- 3 Custom Domains
- All Taxonomy Types
- Bulk URL Cloning
- QR Codes
- Conventions
- Grid Mode URL Builder
- Email Builder
- Auto-generated Tracking IDs
- Automated Exports
- API Access
- Custom Users
- Custom Projects
- Custom Domains
- Single Sign-On (SSO)
- Invoice Billing
- Signed Agreement
- SOC 2 Type 2